Example Asbestos Removal Projects in Walnut Creek

Every project below starts with a sample or a survey, and each one shows the building, the lab result, what happens next, the time it takes and an approximate cost. Nearly a quarter of Walnut Creek homes date from the 1960s and almost three in ten from the 1970s, and Lafayette and Orinda have more houses from the 1950s, so the examples are set in all three.

We made these examples up to show how jobs run; they are not past work, clients or addresses. The house ages, steps and prices in them reflect the East Bay today, so you can plan before asking for a quote.

Condo ceilings and kitchen floor before a unit remodel

Example project
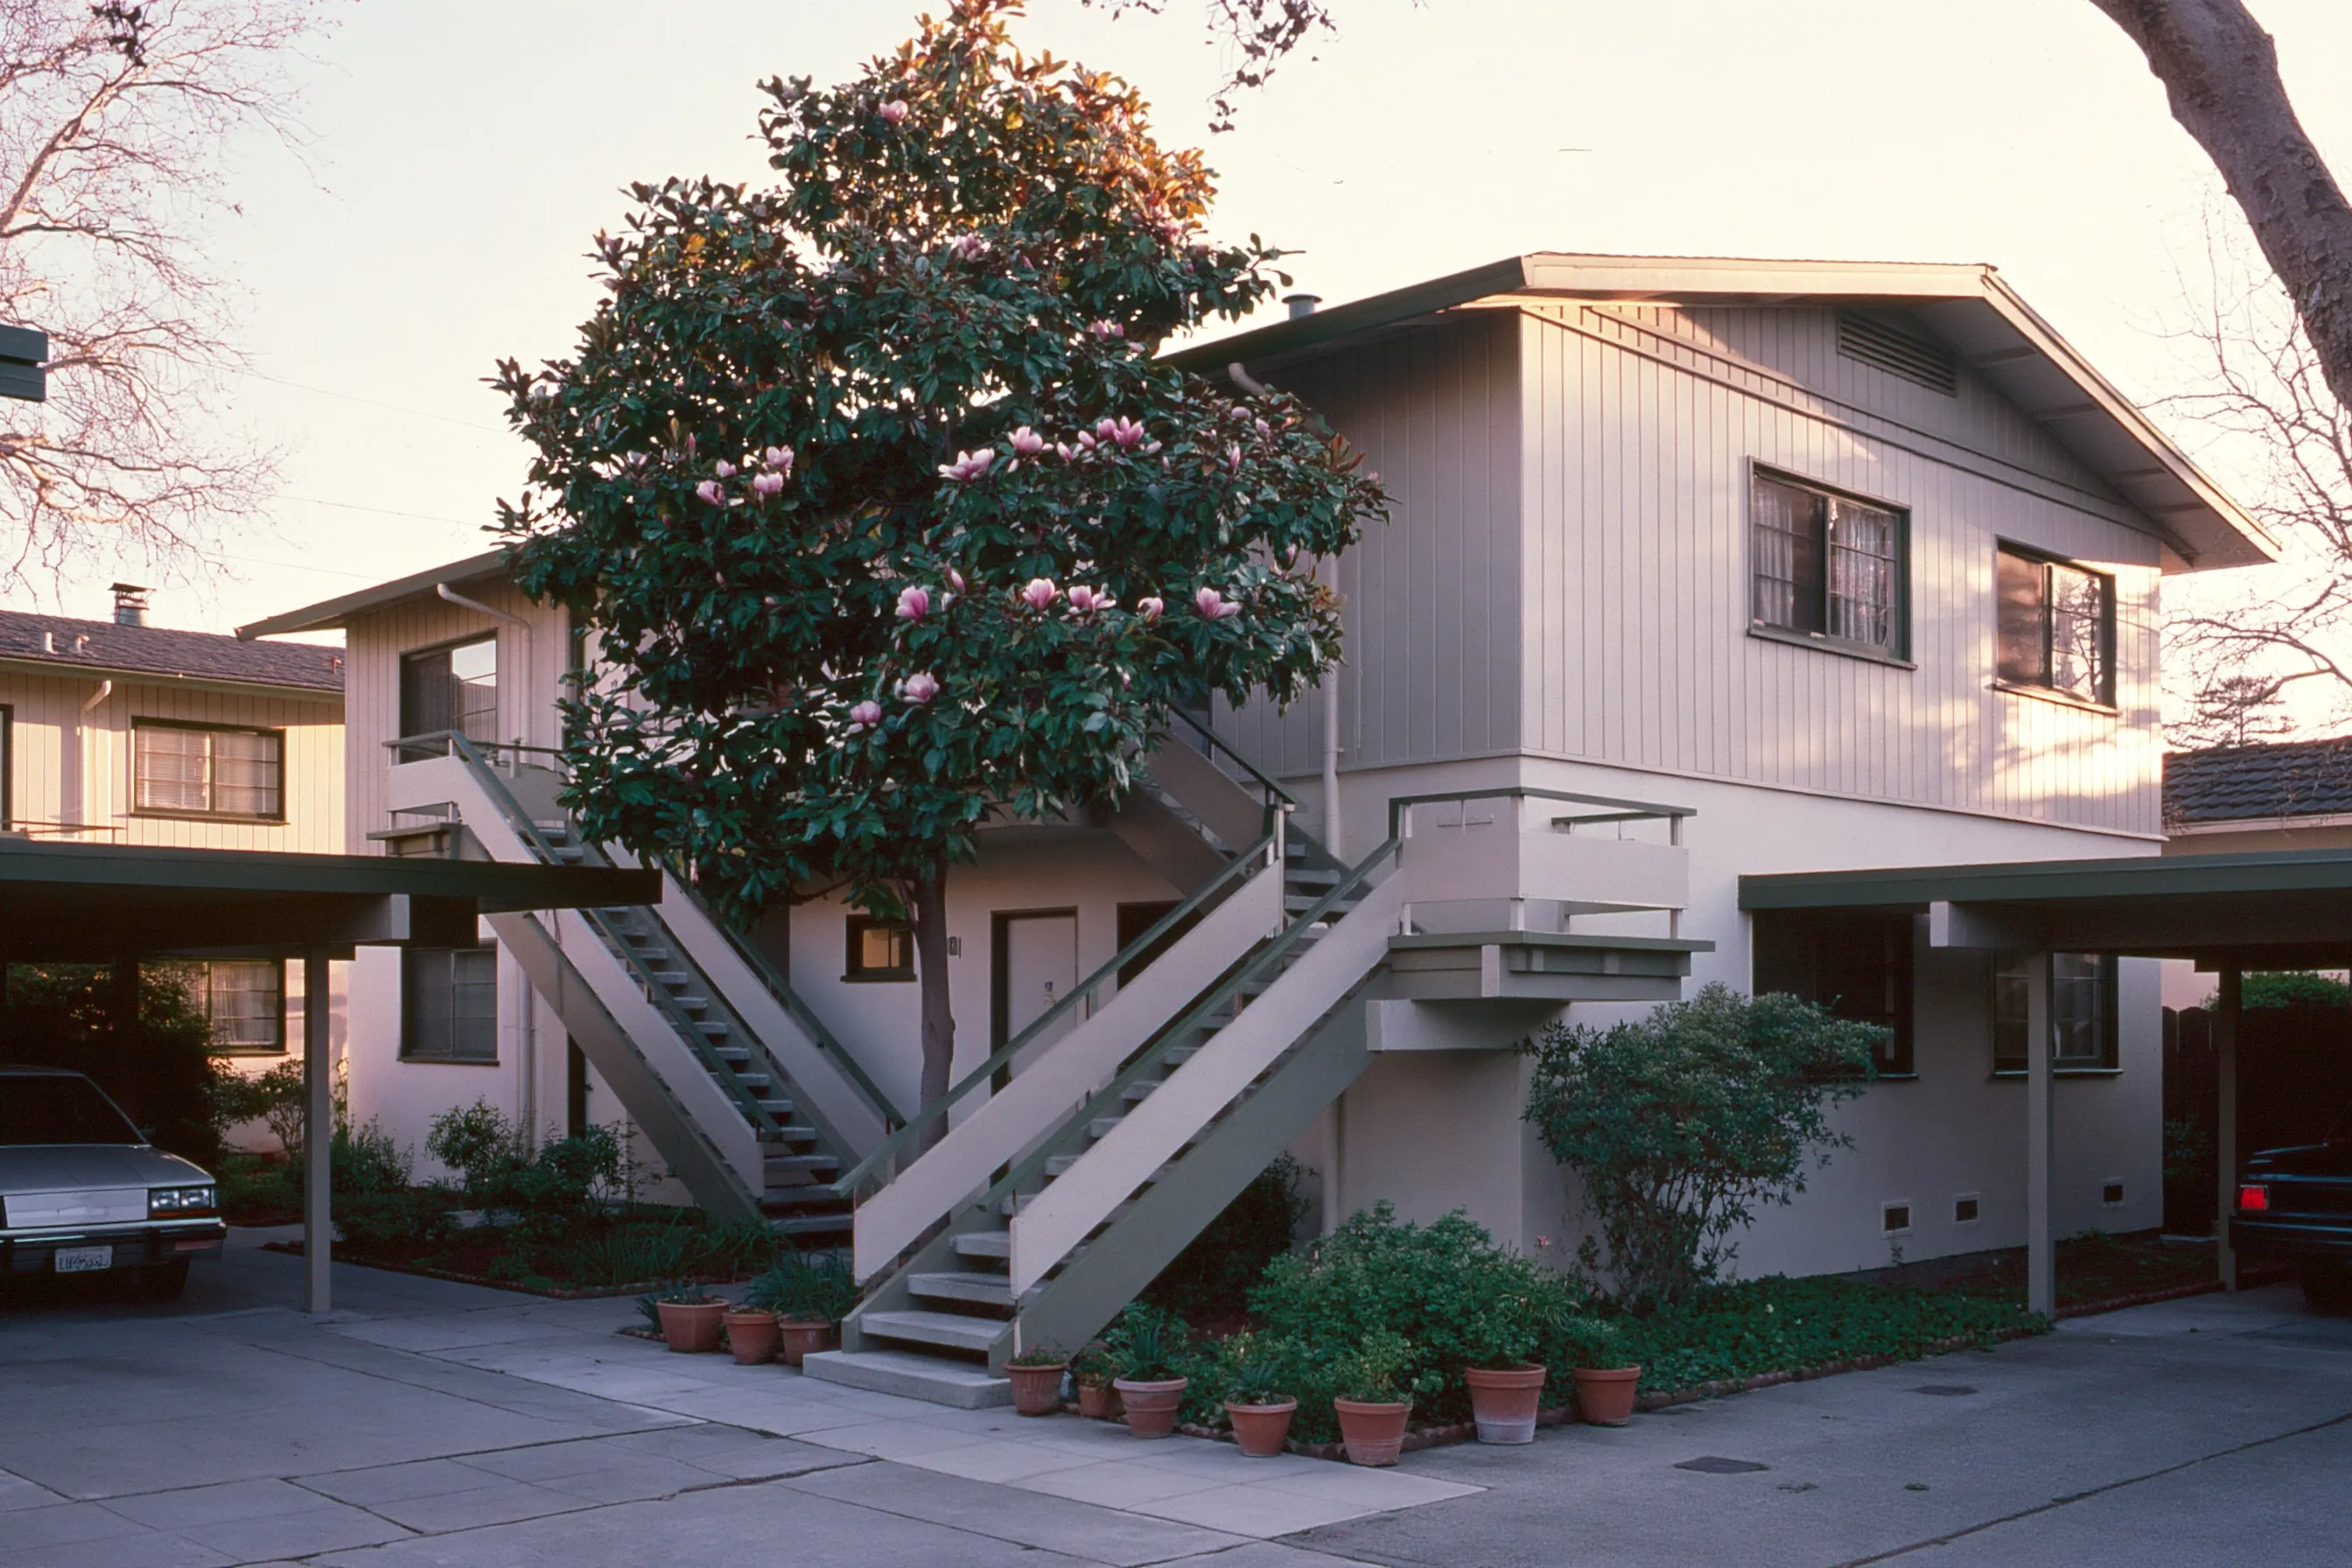
Two-story building with vertical wood siding, outside stairs, carports on both sides and a flowering magnolia tree in front
Building
1960s two-story condominium building in Walnut Creek, ten units, with outside stairs and carports
Unit
Ground-floor unit of about 760 sq ft
Original request
Smooth ceilings and a new kitchen floor, with the homeowners association's approval
Testing
Certified survey of the unit's ceilings, walls and floors
Found
Asbestos in the ceiling texture and the 9-inch kitchen tile; the walls are clear
Work
About 620 sq ft of ceiling and 190 sq ft of kitchen floor, inside plastic, in the hours the board allows
Timeline
Survey, J# and the board's approval, then about five days of work
Estimated cost
$8,200

Scope of work

A certified survey of the unit, a J#, the unit sealed with plastic and filtered air, the ceiling texture scraped off wet, the kitchen tile lifted and the mastic scraped off, sealed bags and shipment records. Add the J# fee from the price table. Notices to the neighbors, the new floor, a skim coat and paint are extra.

Project overview

In this example, the owner of a ground-floor unit in a 1960s condominium building in Walnut Creek wants smooth ceilings and a new kitchen floor. The building has ten units, so the short sample list for houses does not apply and a certified consultant surveys the unit. The ceiling texture and the 9-inch kitchen tile are positive. The walls are clear.

The homeowners association board approves the work hours and posts a notice for the neighbors. The ceiling and floor together pass 100 sq ft, so a J# is filed, and the work runs inside plastic on the days the board allows.

The goal

The goal is bare ceilings and a bare kitchen subfloor, with the unit clean and the board and neighbors informed throughout.

Process

  1. Weeks one and two Certified survey of the unit, lab results, and the J# filed.
  2. Board approval The board agrees the work hours, the waste route and the notice to the neighbors.
  3. About five days Unit sealed, ceiling texture scraped off wet, kitchen tile lifted and the mastic scraped, then bagged.
  4. Last day Unit vacuumed and wiped, waste carried out by the agreed route, plastic down.

Planning right

  • Ask the board for its rules on contractors, hours and the elevator or stairs before you book.
  • The unit owner pays for work inside the unit. Shared walls and ceilings may be the building's.
  • Neighbors should know the dates. A closed door and plastic keep the dust inside the unit.
  • Keep the survey and the waste records for the board and for a future sale.
Get a free quoteMore about condo and townhome abatement

Plaster wall opened for a new closet

Example project

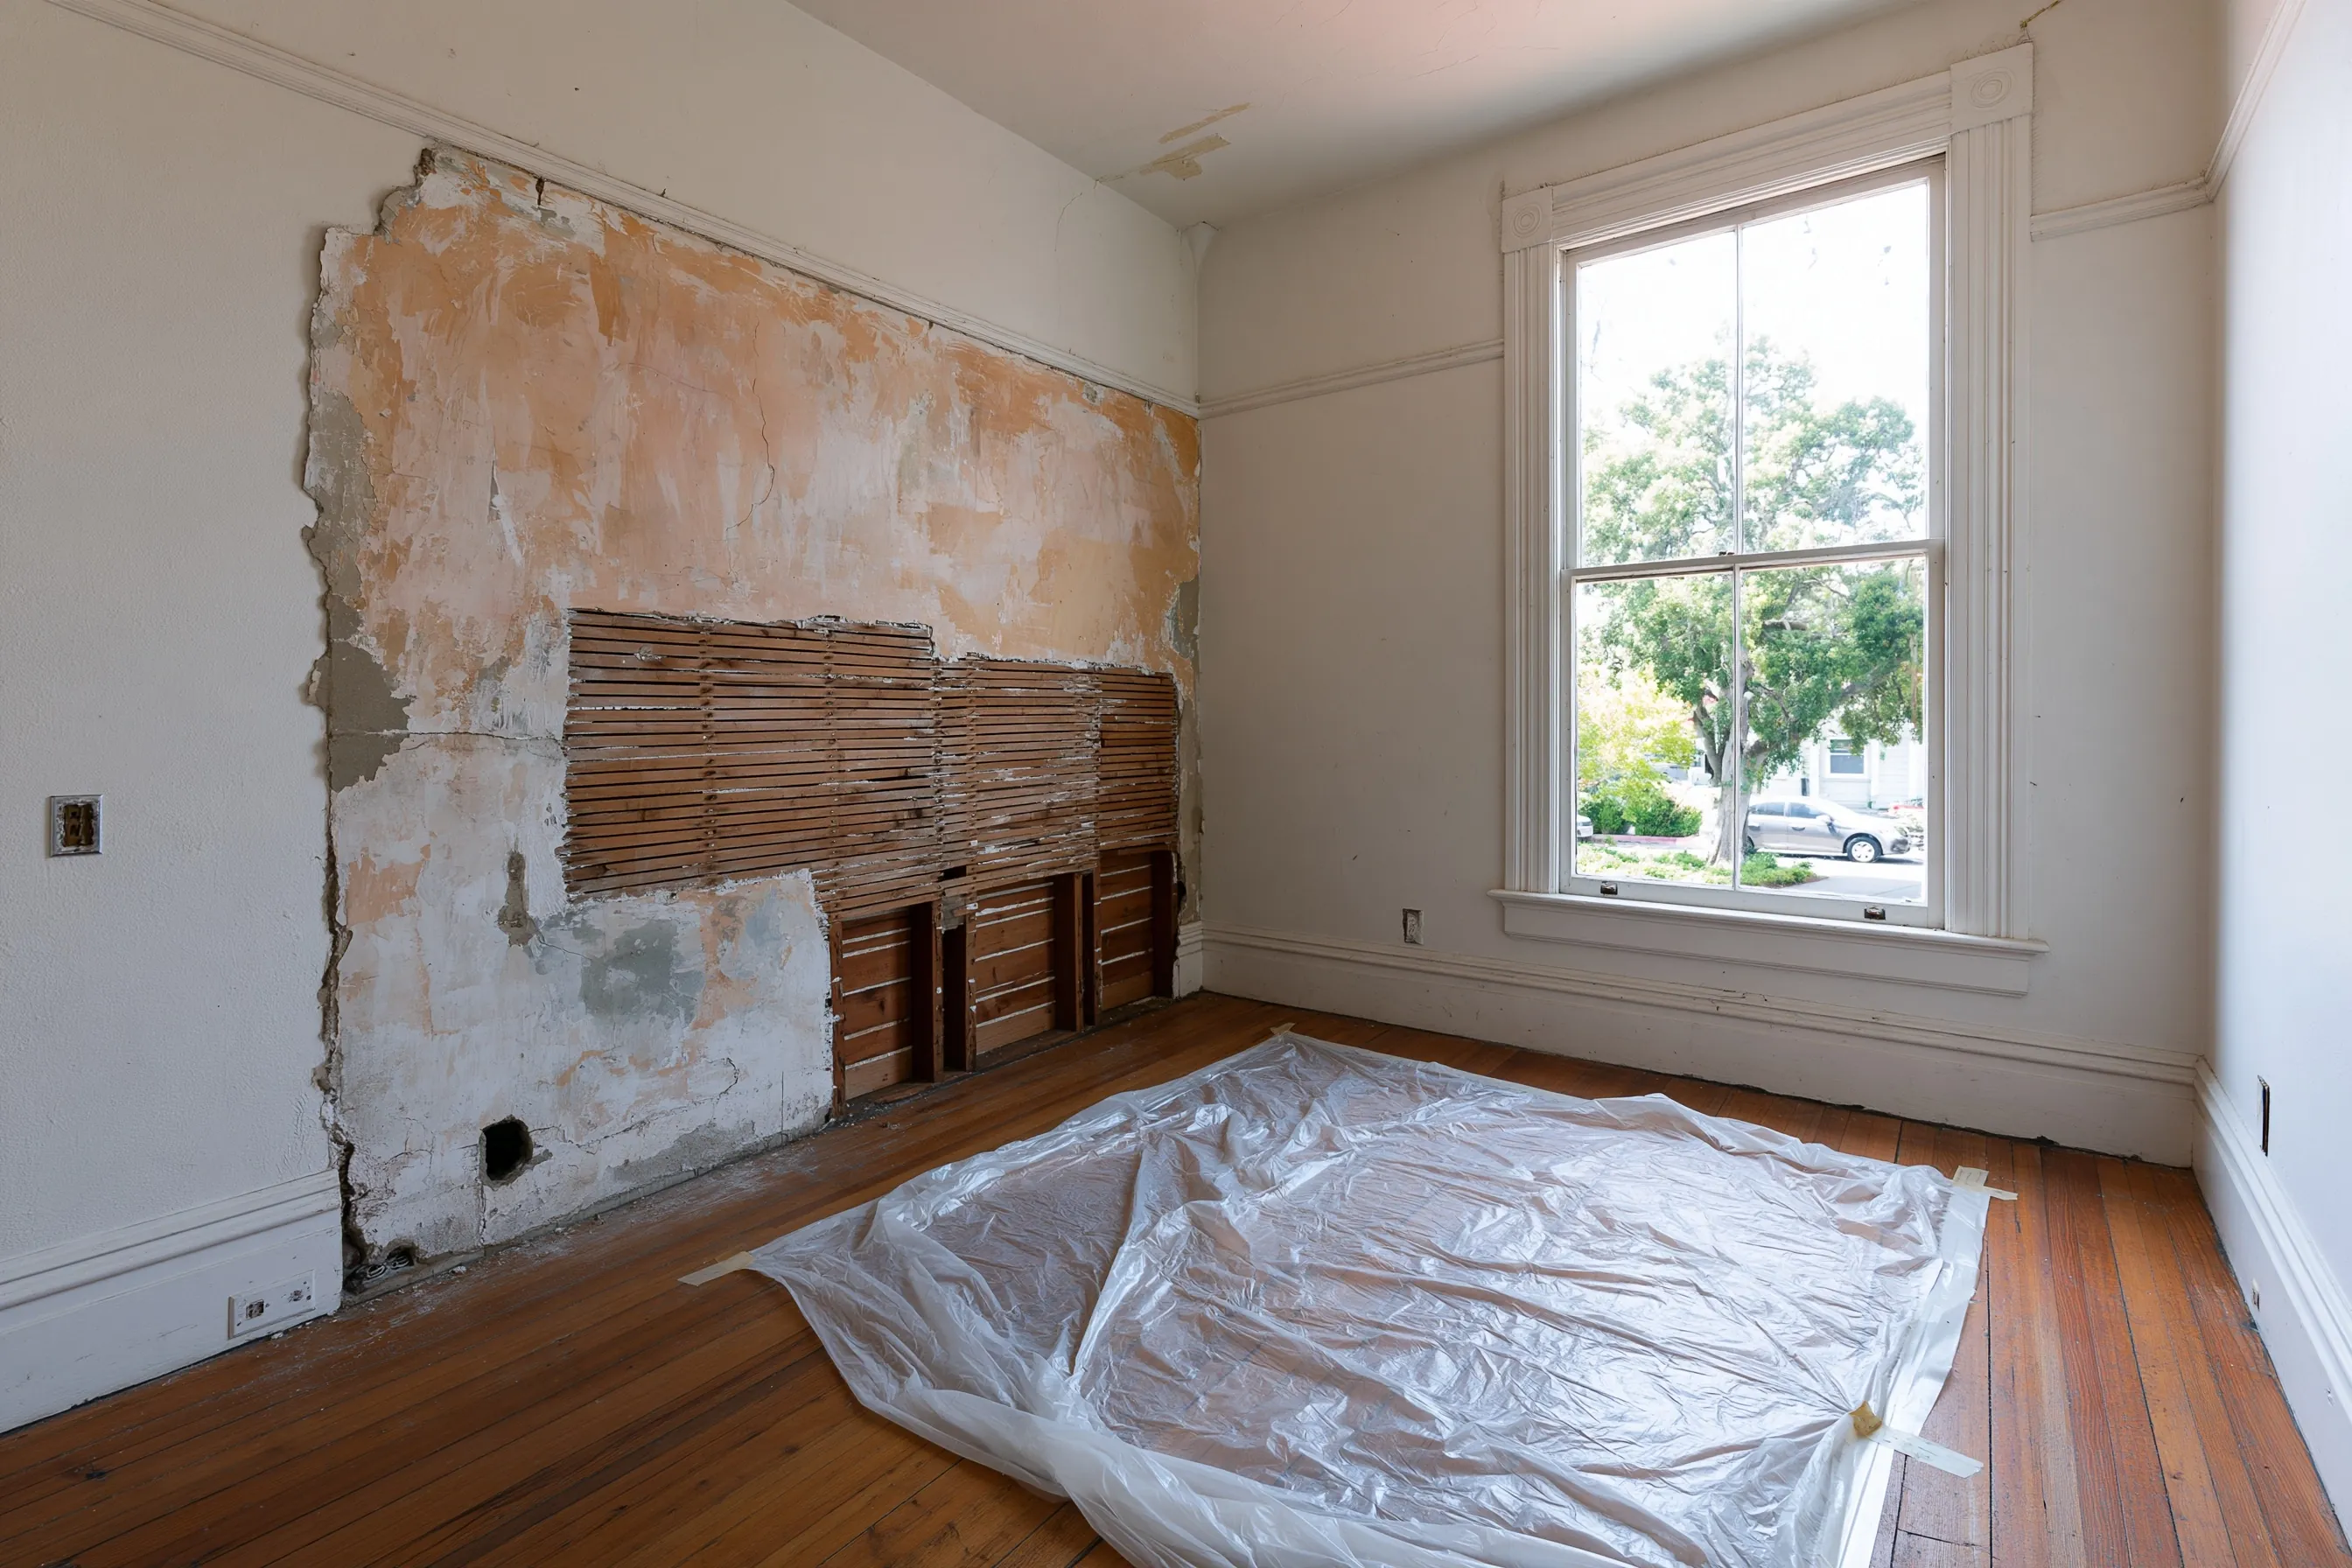
Bedroom with a tall double-hung window, plaster cut away from one wall to show the wood lath, and plastic sheeting over the plank floor
Home
1920s house in Lafayette, with plaster walls and plank floors
Original request
A closet in the back bedroom, built into part of one plaster wall
Testing
Separate samples of the gray base coat, the white finish coat and the wood lath
Found
Asbestos in the white finish coat only; the base coat and the lath are clear
Opening
About 60 sq ft of wall, under the 100 sq ft that needs a J#
Work
Wall taken down wet in sections, inside plastic and filtered air
Timeline
One day, with the carpenter framing the closet the next morning
Estimated cost
$2,700

Scope of work

A lab test of each plaster layer, plastic on the floor and across the doorway, a filtered air unit, the closet wall taken down wet in sections, sealed bags, a HEPA vacuum and a wet wipe, and disposal. Framing, drywall and paint are extra.

Project overview

In this example, the owners of a 1920s house in Lafayette want a closet in the back bedroom. Few Lafayette houses are this old, and the wall they will open is plaster on wood lath. A lab tests each layer on its own and finds asbestos in the thin white finish coat only.

The finish coat is bonded to the base coat, so the two come down together. At about 60 sq ft the wall is under the amount that needs a J#. The crew wets it and takes it down in sections, with the plastic and the air unit running.

The goal

The goal is a bare wall for the new closet, with the asbestos finish coat gone and the rest of the house clean.

Process

  1. Sampling Pieces of each coat and the lath go to a lab, and the closet wall is marked.
  2. Setup Furniture out, the floor and the doorway covered, the air unit running.
  3. Removal The wall wetted and taken down in sections, bagged as it comes off.
  4. Next morning The room has been cleaned and the carpenter frames the closet.

Planning right

  • A thin finish coat can hold asbestos when the thick base coat does not.
  • A plaster wall that stays whole is left alone. This one comes down only because it is being opened.
  • Keep sawing and sanding out of the room until the wall is down.
  • File the lab report with the house papers.

Get a free quoteMore about plaster and joint compound removal

Survey before part of a hillside house is taken down

Example project

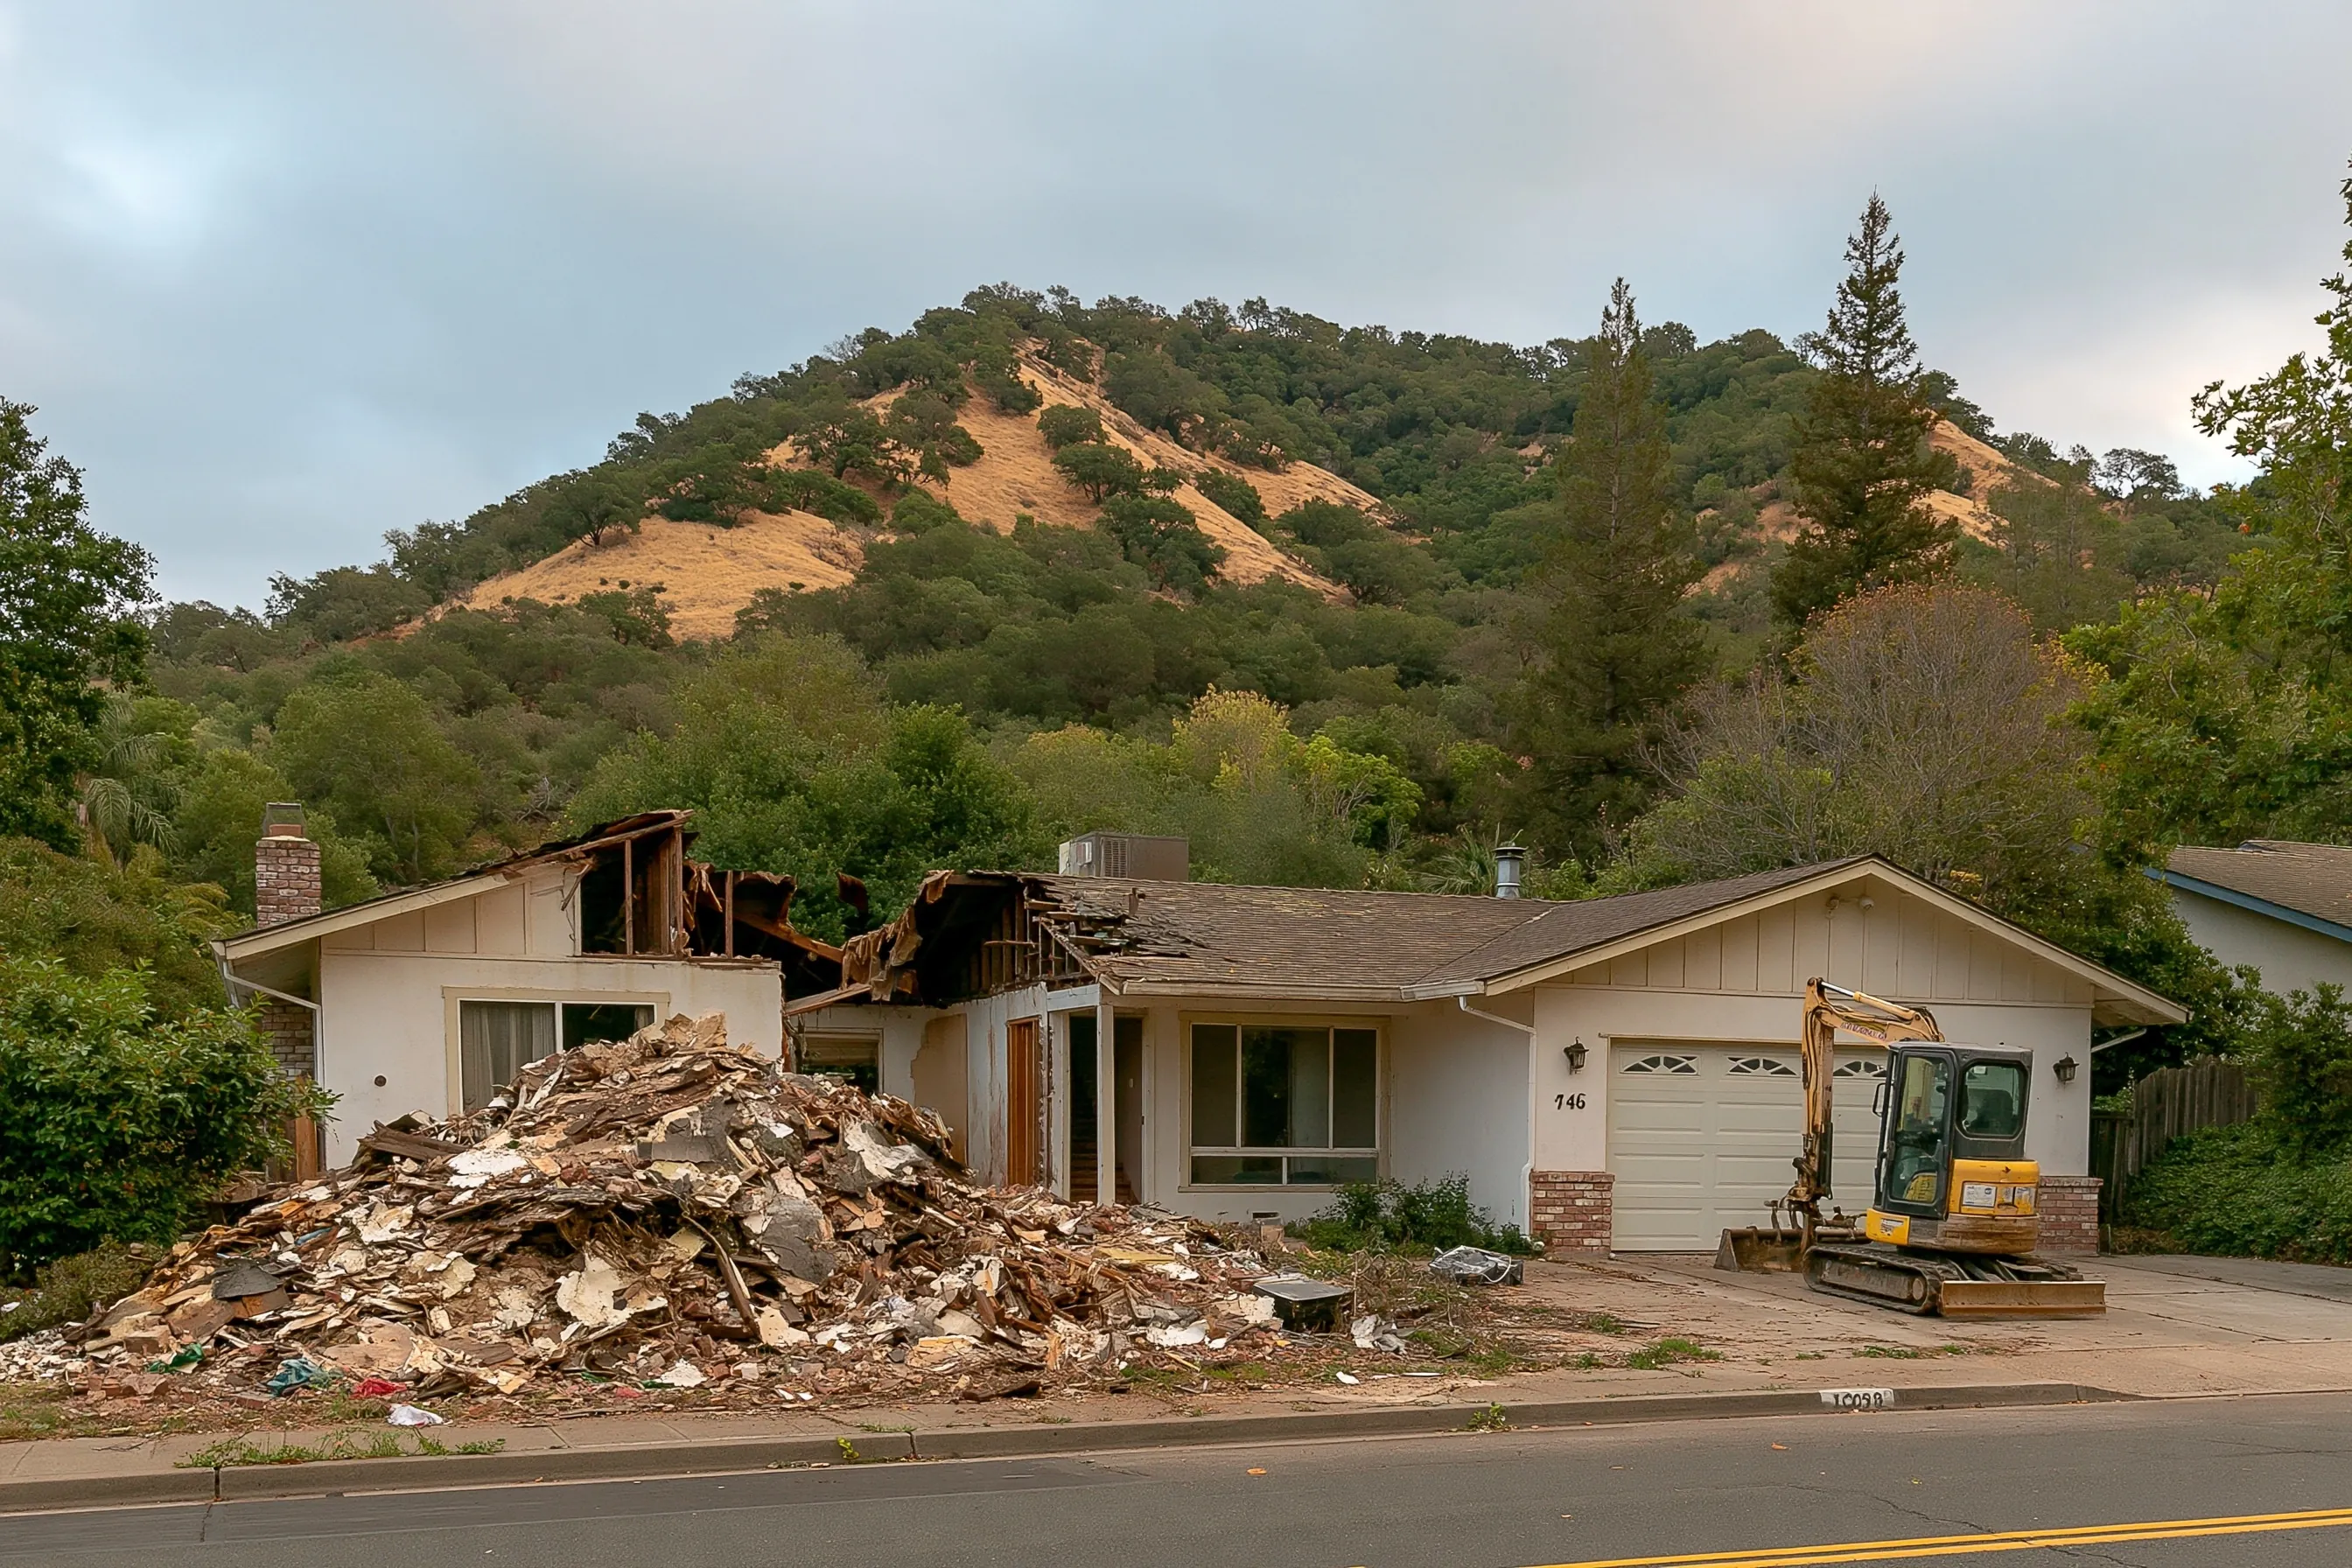
Single-story house with a two-car garage and brick planter at the foot of a wooded hill, one wing torn down, a debris pile in the front yard and a small excavator in the driveway
Home
1960s single-story house in Orinda, with a two-car garage and a brick planter, on a street at the foot of a wooded hill
Original request
Take down the wing on the left and rebuild it larger
Testing
About 14 samples from the wing and from the rest of the house the plans will touch
Found
Asbestos in the ceiling texture and the sheet vinyl of the wing; the rest of the house is clear
Demolition
A small excavator takes the wing down after the removal, with the debris piled in the front yard for sorting
Timeline
Survey visit in one day, report a week later
Estimated survey cost
$1,400

Scope of work

A visit to sample every material in and around the wing, lab fees and a written report the owners can hand to the builder and the demolition crew. A J# for the demolition, the removal of the positive materials and the demolition itself are priced separately.

Project overview

In this example, the owners of a 1960s house on a wooded hillside in Orinda plan to take down the wing on the left and rebuild it larger. Any demolition needs a J#, and the wing and the rest of the house the plans touch are sampled first. The ceiling texture and the sheet vinyl in the wing come back positive. The rest is clear.

The owners hand the report to the builder. The positive materials come out of the wing before the excavator arrives, and the wing is taken down first, with the debris sorted in the front yard.

The goal

The goal is one report that tells the owners and the builder exactly which materials in the wing need asbestos removal before it comes down.

Process

  1. Before the visit The owners send the plans, and we list every material the work will touch.
  2. Survey visit Samples from the wing and from every room the plans reach.
  3. One week later Lab results and a written report of what is positive and what is clear.
  4. Then The report goes to the builder, and the removal and the J# for the demolition are booked.

Planning right

  • Ask the Orinda permit counter what the demolition and the rebuild need. The J# is a separate filing.
  • A hillside lot can limit where waste bins and the excavator go. Tell us about the driveway.
  • The wing comes down only after the positive materials are out.
  • Keep the report with the plans. The builder and the permit file both ask for it.

Get a free quoteMore about remodel and teardown abatement

Living room ceiling stripped before it is opened up to the roof

Example project

Home
1970s single-story house in Walnut Creek
Original request
Open the living room ceiling up to the roof for a vaulted ceiling with exposed beams
Testing
Samples of the sprayed texture and of the drywall under it
Found
Asbestos in the texture; the drywall is clear
Area
About 320 sq ft of ceiling
Work
Texture soaked and scraped off inside plastic with a filtered air unit, before the drywall comes down
Timeline
J# wait of 10 working days, then two days of work
Estimated cost
$3,800

Scope of work

A lab test of the texture and the drywall, the living room sealed with plastic and a filtered air unit, the texture wetted and scraped off, sealed bags, a HEPA vacuum and wet wipe, and disposal. Add the J# fee from the price table. Taking the drywall down, the beams, a new ceiling and paint are extra.

Project overview

In this example, the owners of a 1970s house in Walnut Creek want the living room ceiling opened up to the roof for a vaulted ceiling with exposed beams. The ceiling has its sprayed texture, so a lab tests it and the drywall under it. The texture is positive and the drywall is clear.

The texture is stripped first, wet and inside plastic, while the drywall is still up. At about 320 sq ft it passes 100 sq ft, so a J# is filed and the work starts 10 working days later. Only after the clearance does the builder take the clean drywall down.

The goal

The goal is bare drywall with no texture left, so the ceiling can be opened to the roof without spreading asbestos.

Process

  1. First visit Samples of the texture and the drywall go to a lab, and the J# is filed.
  2. Ten working days later Furniture out, plastic up, filtered air unit running.
  3. Two days Texture soaked and scraped off, bagged, the room cleaned.
  4. Then The builder takes the bare drywall down and opens the ceiling to the roof.

Planning right

  • Strip the texture before the drywall comes down. Breaking the ceiling first spreads the texture.
  • Tell the builder about the clear drywall. It can come down the usual way once the texture is gone.
  • Keep other rooms with the same texture in mind. Adding them now costs less than a second visit.
  • Ask for the lab report for the permit file.

Get a free quoteMore about popcorn ceiling removal

Kitchen floor tile taken up before radiant heating goes in

Example project

Home
1960s single-story house in Walnut Creek, on a concrete slab
Original request
Radiant floor heating under new tile in the kitchen and dining nook
Testing
The 9-inch vinyl tile and the black mastic under it sampled separately
Found
Asbestos in both the tile and the mastic
Area
About 260 sq ft, with the tile glued straight to the slab
Work
Tile lifted whole, then the mastic scraped off the slab wet, inside plastic
Timeline
J# wait of 10 working days, then two days of removal before the heating installer
Estimated cost
$5,100

Scope of work

A lab test of the tile and the mastic, the kitchen and nook sealed with plastic, the tile lifted whole while kept wet, the mastic scraped off the slab wet, sealed bags, a HEPA vacuum and wet wipe, and disposal. Add the J# fee from the price table. The radiant heating, the new tile and the cabinets are extra.

Project overview

In this example, the owners of a 1960s house in Walnut Creek are putting radiant heating under new tile in the kitchen and the dining nook, with the cabinets staying. The heating pads go on bare concrete, so the old floor has to go first. A lab finds asbestos in the 9-inch tile and in the black mastic under it.

Wet and by hand, the tile comes up whole and the mastic is scraped from the slab up to the cabinet bases, never ground. At about 260 sq ft it passes 100 sq ft, so a J# is filed and the work starts 10 working days later. The heating installer arrives to bare concrete.

The goal

The goal is a bare, clean slab ready for the radiant pads, with the asbestos tile and mastic gone.

Process

  1. Before the quote The heating installer asks for the lab result, so the sample goes in first.
  2. Setup Counters and doorways are covered, and a filtered air unit is set up.
  3. First day The tile is wetted and lifted whole, then bagged.
  4. Second day The mastic is scraped from the slab, the kitchen is vacuumed and wiped, and the plastic comes down.

Planning right

  • Radiant pads need the mastic gone, not painted over, for the new tile to bond.
  • Cabinets that stay are wrapped, and the floor under them is left alone.
  • Sanding or grinding the old floor yourself to save a step spreads the dust.
  • Choose the pad layout with the installer after the slab is bare, not before.

Get a free quoteMore about floor tile and mastic removal

Small shop floor tile taken up before a drain trench is cut

Example project

Building
Small ground-floor shop of about 500 sq ft in a 1960s two-story building downtown, other tenants open
Original request
Turn the shop into a hair studio, with new sinks and a drain trench cut through the slab
Testing
Certified survey of the suite
Found
Asbestos in the 9-inch floor tile and its mastic in the main room, and in the sheet vinyl of the back room
Area
About 500 sq ft of floor
Work
Behind a plastic wall and filtered air at the entrance, with the tenants next door open
Timeline
Survey and J#, then about three days of work
Estimated cost
$7,500

Scope of work

A certified survey of the suite, a J#, a sealed work area with a zipper door and a filtered air unit, the tile and sheet vinyl lifted wet and the mastic scraped off, sealed bags and shipment records, and a clearance air test. Add the J# fee from the price table. The trench, the plumbing and the build-out are extra.

Project overview

In this example, a small shop in a 1960s downtown building in Walnut Creek is becoming a hair studio. The new sinks need a drain trench cut through the slab, and a commercial suite needs a certified survey first. The 9-inch tile and its mastic in the main room and the sheet vinyl in the back room are positive.

The neighbors stay open, so the work runs behind a plastic wall and a filtered air unit at the entrance. At about 500 sq ft it needs a J#, and a clearance air test is done before the plumber cuts the slab.

The goal

The goal is a clean slab for the plumber, with the asbestos floor gone and the neighboring shops open throughout.

Process

  1. Weeks one and two Certified survey of the suite and lab results; J# filed.
  2. Before work The building manager and the neighbors are told the dates.
  3. About three days Suite sealed, tile and vinyl lifted wet, mastic scraped off the slab, waste bagged.
  4. Last day Clean, inspection and a clearance air test before the plastic comes down.

Planning right

  • Ask the landlord for any earlier survey of the building. It can save sampling.
  • The plumber cuts the slab only after the clearance result is in.
  • Waste leaves by the route the building manager sets.
  • Keep the survey and the clearance result for the tenant file.

Get a free quoteMore about commercial and office abatement

Request a free asbestos removal quote

Tell us what the work involves, whether it is a house, a condo or a commercial suite, roughly when it was built and whether anything has been tested. We'll get back to you soon with an estimate or any questions we have. Estimates are free and there's no obligation.

Call (925) 940-6898

Call (925) 940-6898